If you’re looking to take your Grand Theft Auto: San Andreas experience to the next level, SAMP is your ultimate destination. This modification allows you to engage in multiplayer gameplay with friends and players from all over the world. Installing San Andreas Multiplayer might seem daunting at first, but with a clear step-by-step guide, you’ll be up and running in no time. Here’s how to get started.
Содержание
Step 1: Prerequisites
Before diving into the installation process, make sure that you have the original version of Grand Theft Auto: San Andreas. You can find this game on various platforms like Steam, Rockstar’s launcher, or even CD versions if you still have them. Ensure that the game is properly installed on your computer, as SAMP will need the core files from GTA: San Andreas to function properly. Also, check your system requirements to ensure your PC can handle the game.
Step 2: Download the SAMP Client
The next step involves downloading the SAMP client. Head over to the official https://samp.world/ website where you’ll find the dedicated download section. Download the latest version of the SAMP client, which is typically in a .zip format. To ensure you have the latest features and bug fixes, always opt for the most updated version available.
Step 3: Extract the Files
Once the download is complete, navigate to the folder where your .zip file is located. Right-click on the downloaded file and select ‘Extract All’ or use software like WinRAR or 7-Zip to unpack the files. You should see a folder named «SAMP» after extraction, which contains several files including samp.exe, the main executable that you’ll use to launch SAMP.
Step 4: Place SAMP in the GTA Directory
To integrate SAMP with your GTA: San Andreas game, you need to place the extracted files in the correct directory. Open the folder where you installed GTA: San Andreas, typically found at C:\Program Files\Rockstar Games\GTA San Andreas (or a similar path depending on your OS). Next, copy the contents of the SAMP folder you extracted and paste them into the GTA directory. Make sure to overwrite any existing files if prompted.
Step 5: Launching SAMP
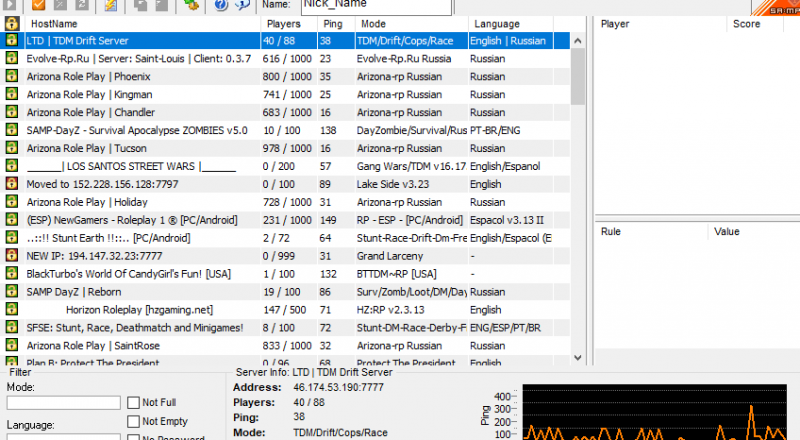
After the files are successfully copied to the game directory, you can launch SAMP by double-clicking samp.exe. It will open a launcher that allows you to connect to various multiplayer servers. In the launcher, you can either browse through the list of available servers or directly enter the server IP address if you already have one in mind. Remember to familiarize yourself with server rules and requirements before diving into gameplay.
Step 6: Configuring Your Settings
Once you’re connected to a server, head into the settings to customize your gameplay experience. Adjust graphical settings for optimal performance, and tweak your controls to fit your preferences. This step is crucial as it can significantly affect your enjoyment while playing SAMP. Each server offers different mods and scripts, so it’s worth taking a bit of time to explore what each one has to offer.
Step 7: Joining the Community
With SAMP installed and set up, you’re now part of a vibrant online community. Engage with other players, participate in various activities like role-playing, racing, or team-based missions. Make sure to check out the forums or official SAMP community pages to stay updated on events, new mods, and other relevant information. These platforms can be a goldmine of tips and strategies to enhance your gameplay.
Installing and enjoying San Andreas Multiplayer is an exciting journey into a realm of endless possibilities. With these steps, you’re all set to jump into the world of multiplayer gaming. Whether you’re racing through Los Santos or engaging in epic role-playing scenarios, SAMP adds a whole new dimension to your GTA experience. Welcome to the community and enjoy your adventures in San Andreas!
